How to use all of Garmin Pilot’s traffic features
One of the standout features in Garmin Pilot is its traffic page. While you can display nearby aircraft on the Map page, as you would in ForeFlight or WingX, Garmin Pilot also has a dedicated traffic screen that looks like it’s right off a panel-mount GTN navigator. This is a decluttered view so it appears simple, but we’ve noticed many pilots don’t notice all the customization options. Here’s a look at what you can adjust.
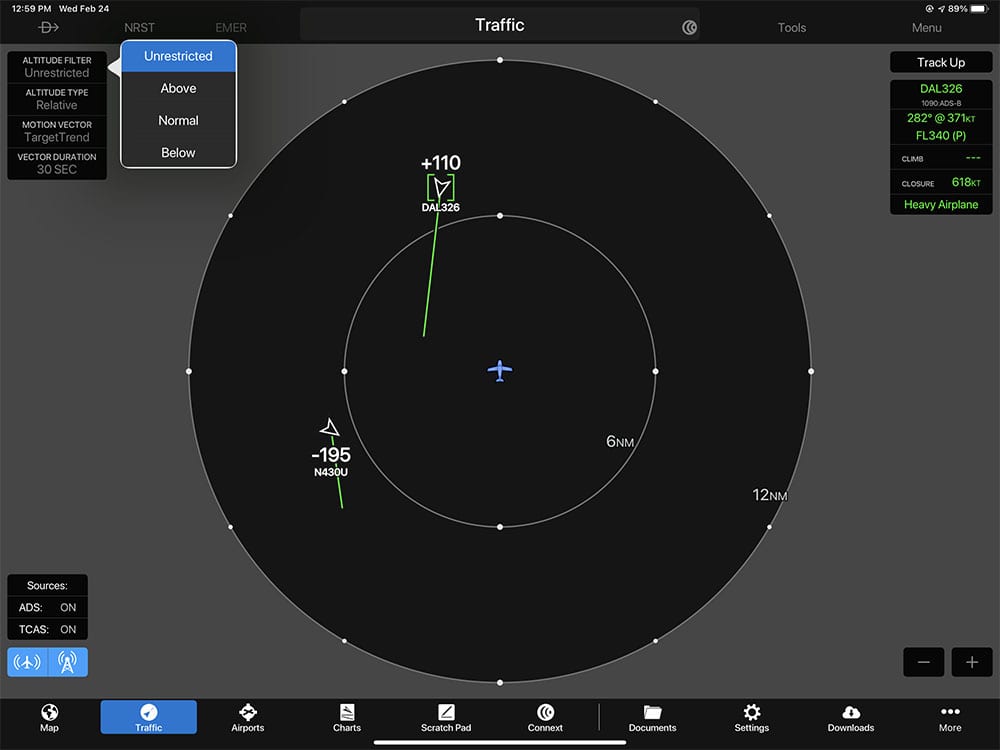
First, remember that you’ll need a traffic source like a portable GDL 50 or a panel-mount GTX 345 to receive traffic. Then go to the Traffic page, where you’ll notice some options at the top left corner of the screen: Altitude Filter, Altitude Type, Motion Vector, and Vector Duration. The default screen will indicate what the current setting is, but you can tap on each block to see the menu of options. In this case, tapping on the top block brings up the altitude filters.
Unrestricted means you’ll see all aircraft, which is sometimes helpful close to an airport but it can make for a cluttered screen. Some pilots like to select Above during climb, which shows traffic from 9000 feet above the aircraft to 2700 feet below the aircraft, and Below for descent (with the same 9000/2700 vertical range in reverse). Normal will serve you well on most flights, showing all aircraft within +/- 2700 feet of your altitude.
Remember that you can also tap on a target to see detailed information about that aircraft, displayed in green text at the top right of the screen.
The next option is Altitude Type, and the options are Relative and Absolute. Almost all pilots will choose Relative, which shows aircraft altitude compared to your current altitude, in hundreds of feet. In the example below, Delta 326 is 11,000 feet above our current altitude. If you prefer to see the actual altitude (34,000 feet in the example below), change it to Absolute.

Motion Vector is a powerful tool, and one of Garmin’s best features. By default, TargetTrend is selected, which shows the other aircraft’s track relative to your position and groundspeed. For example, if you’re flying the same direction as another airplane but are going significantly faster than it is, the other airplane’s TargetTrend will actually point backwards. That means that, while the airplane is moving the same direction you are, the closure rate is negative. It sounds simple, but this eliminates a lot of mental math in a busy situation—you know at a glance if an airplane is a threat or not.
Note that TargetTrend vectors show up in green, while switching to Absolute will show the current track of the airplane (irrespective of your track) in white. You can see the specific closure rate by tapping on a target, which is almost 600 knots below.

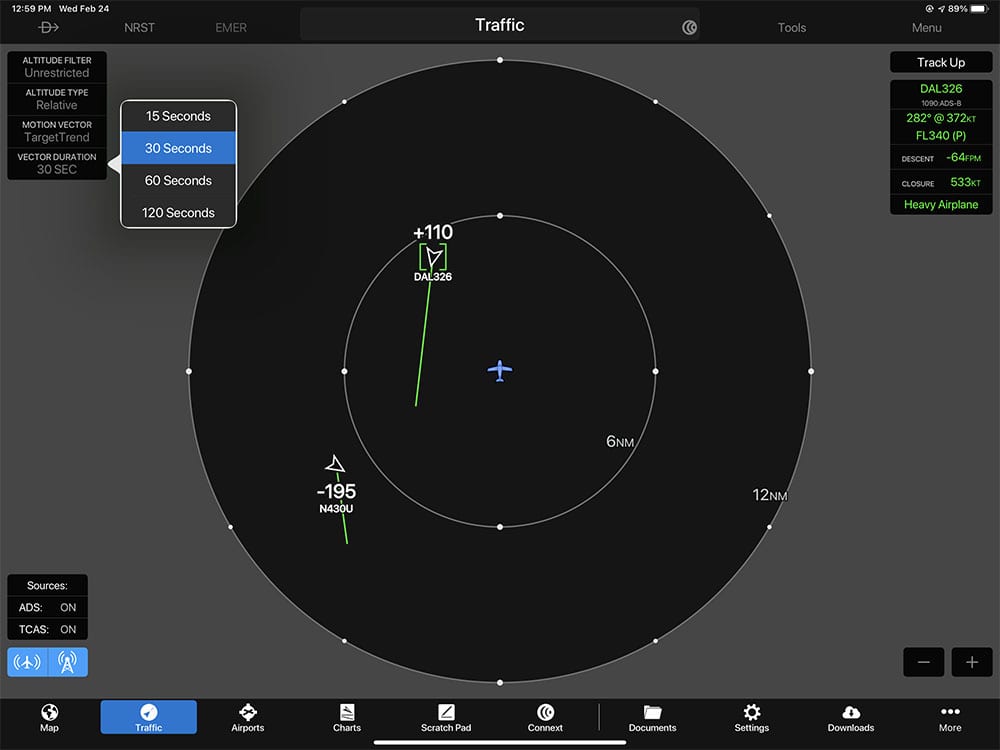
The last option at the top left is Vector Duration, which simply determines how long the vector is on the screen. 30 seconds is a good choice for most pilots, but there are options for 15/30/60/120 seconds.
That covers the four main options, but the bottom left corner shows another important data field: traffic status. The two symbols represent air-to-air, meaning direct transmissions from other airplanes equipped with ADS-B Out, and TIS-B, which is the traffic data rebroadcast by FAA ground stations. Blue means active, but like most things on this page, you can tap on the symbols for more details. (For a refresher on how ADS-B traffic works, read this article.)

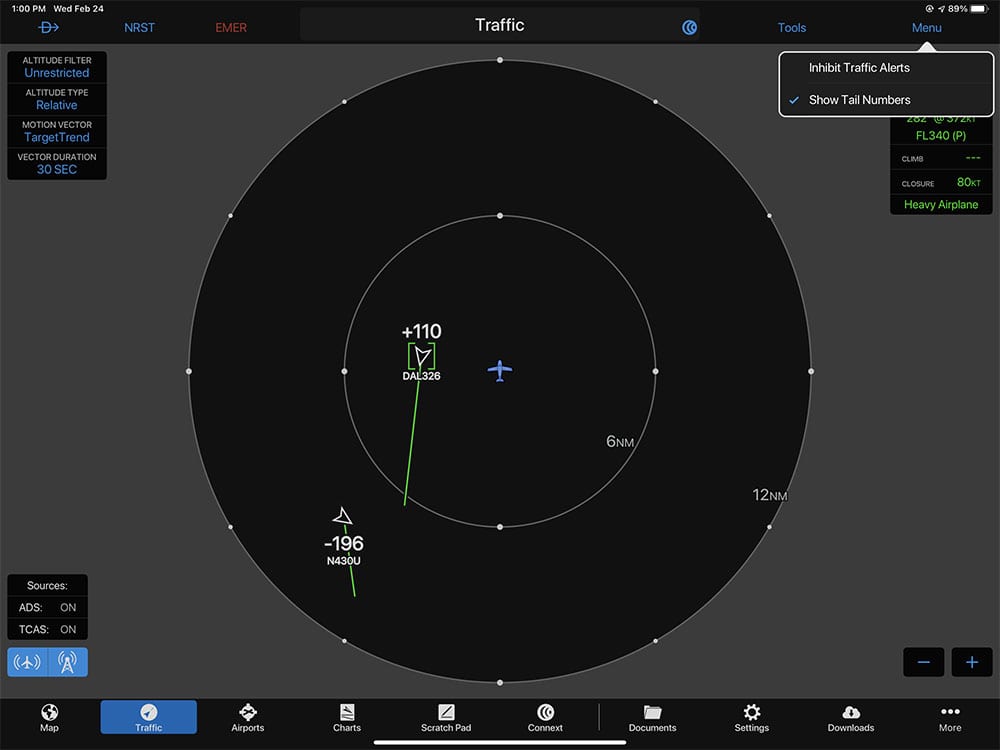
At the top right, the ever-present Menu button offers two additional options for the Traffic page. Inhibit Traffic Alerts will mute any pop-up alerts in the app, and Show Tail Numbers (on by default) shows the N-number or flight number for targets on the screen.
There’s one last option, and it’s obvious but often overlooked—range. The – and + icons in the bottom right corner allow you to zoom out and in, and Garmin Pilot offers an impressive range. You can zoom all the way in to 0.5 nm or zoom out to 48 miles.

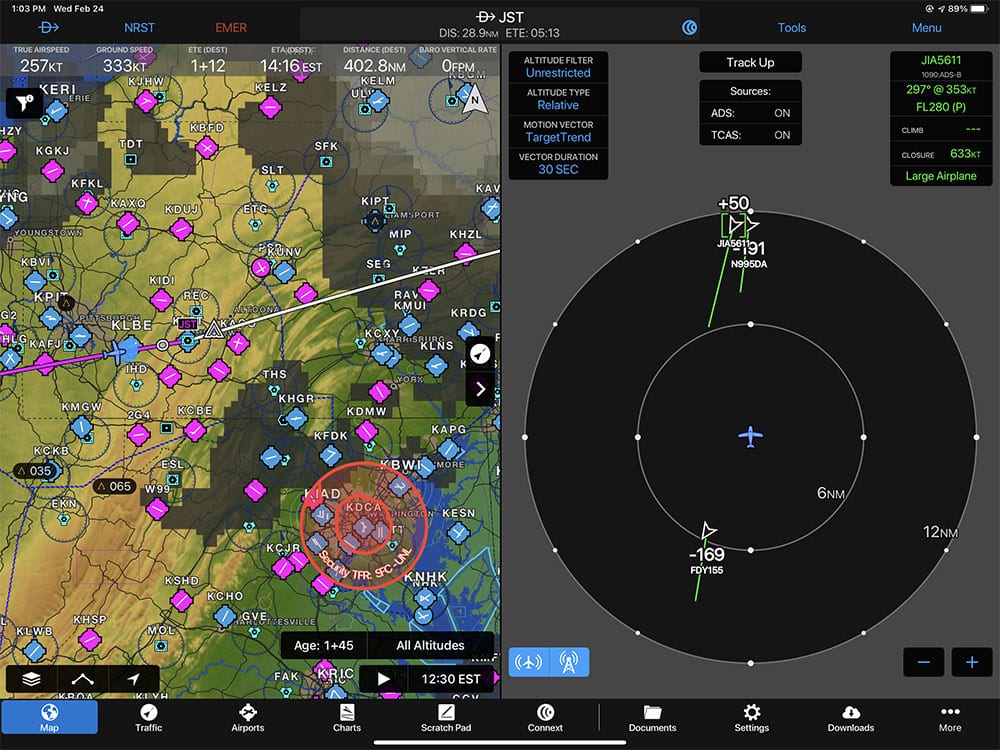
The good news is, all of these options can be displayed in Garmin’s split-screen view as well. This is the best of both worlds, with a complete moving map on the left side and a clean traffic view on the right side. It’s the perfect setup for takeoff and landing, when you might need additional detail in busy airspace.


Another way to get a dedicated traffic display is the GI275 PFD. It gives you many options, it wasn’t until I got one that I realized how versatile it is.
Is it possible to view simulated / network traffic like Vatsim, Pilotedge in GarminPilot App when using it with MSFS 2020 or X Plane-11 ?