It’s been nearly a year and a half now since I’ve had to fumble through an approach chart book, locate an ILS approach chart and secure the book with a clip to hold the page open (and I probably had a flashlight hanging out of my mouth if it was dark out). No, I didn’t buy a brand new G1000-equipped Cessna with electronic charts. I did, however, buy an iPad and started using ForeFlight as my primary source of charts and aviation data in the cockpit. The combination of a rock-solid piece of hardware from Apple with a reliable, easy-to-use chart and navigation application from ForeFlight has made several aspects of my flying safer, easier to manage, and more enjoyable.
Over the past 18 months I’ve learned a lot through trial and error flying with the iPad in general aviation aircraft, and have assembled my top 12 tips:

Is your chart really downloaded?
1. Use Airplane Mode to verify that chart databases are downloaded
There are a variety of apps available in the app store that display FAA charts in the cockpit. Since there is no internet connection in the air, you must download the chart databases before you go flying. While on the ground (and connected to the internet), you can view every possible chart simply by loading the map feature, and panning around the US. The app will automatically download the required charts on the fly, but the app is only downloading these charts temporarily. Just because you see a chart does NOT mean it will be available offline. You still need to use the app’s download tool to store the data for the states or region you will be flying in.
No matter which app you’re using, here’s a simple preflight test to verify that the charts are successfully downloaded: turn on Airplane Mode from the iPad’s setting page (this disables your internet connection), and check to see if the charts load properly.

Keep the iPad secure, or it becomes a weapon.
2. Secure it in the cockpit
To maximize usability in the airplane (especially in turbulence), you’ll want to secure the iPad either to your leg or use a cockpit mount. Using a kneeboard designed for the iPad is a great option for aircraft renters who want a simple option that easily transfers between multiple airplanes. There are several features you’ll want to pay attention to:
- Allows for iPad to rotate between landscape and portrait views
- Allows angle adjustments toward you to minimize glare
- Size – make sure it will not interfere with the yoke or throttle quadrant
- Protection – many kneeboards also double as cases for the iPad outside of the airplane
(check out a variety of iPad kneeboards here)
Another option is to use Ram Mounts to temporarily secure the iPad in the cockpit. Here are some options:
- Yoke Mount – works well in Cessna and Piper aircraft, and can be used on the co-pilot’s yoke if it blocks the pilot’s panel
- Glareshield Mount – good option for mounting the iPad in front of the co-pilot’s seat
- Suction Mount – easily secures to the side window, and works well for aircraft with side stick controls like a Cirrus or Cessna Corvalis
(check out all the Ram Mount options)

Screen capture is ideal for nav logs and weather reports.
3. iPad screen capture
During the flight planning process, online flight planners provide excellent navigation logs that can be very useful in the cockpit. The problem is most of us don’t have internet access in the air. Of course you could print them, but the goal here is to have a paperless cockpit. Using the iPad’s built-in screen capture function, you can quickly save a copy of whatever’s on the Safari web browser screen with a few button presses. Here’s how:
- Pinch, zoom and position the data on the screen in Safari so all the important information is viewable (in this example we’re showing a fltplan.com Navigation Log)
- Now, simultaneously press the Home Button (lower front of screen) and the On/Off button (on the top right), and you’ll see the screen flash white and hear a camera shutter sound
- Next, go back to your home screen, and locate the “Photos” app (this has a yellow flower as the icon). When you click on this, you’ll see a photo of what was on your Safari web page. This is now stored internally on the iPad, allowing you to view your important flight planning data without an Internet connection in the air.
- If you have more info that than will fit on one screen, take multiple screen captures (don’t worry — these don’t take up much space on your iPad’s internal memory).
- When finished with the flight, go back into the “Photos” app and delete the screen capture photo by clicking the “Garbage Can” icon at the upper right.
Use your imagination on this one — you can save any screen from any application. Use it to store official weather briefings, TFR maps, or a screen from any other app that requires an internet connection to display data.

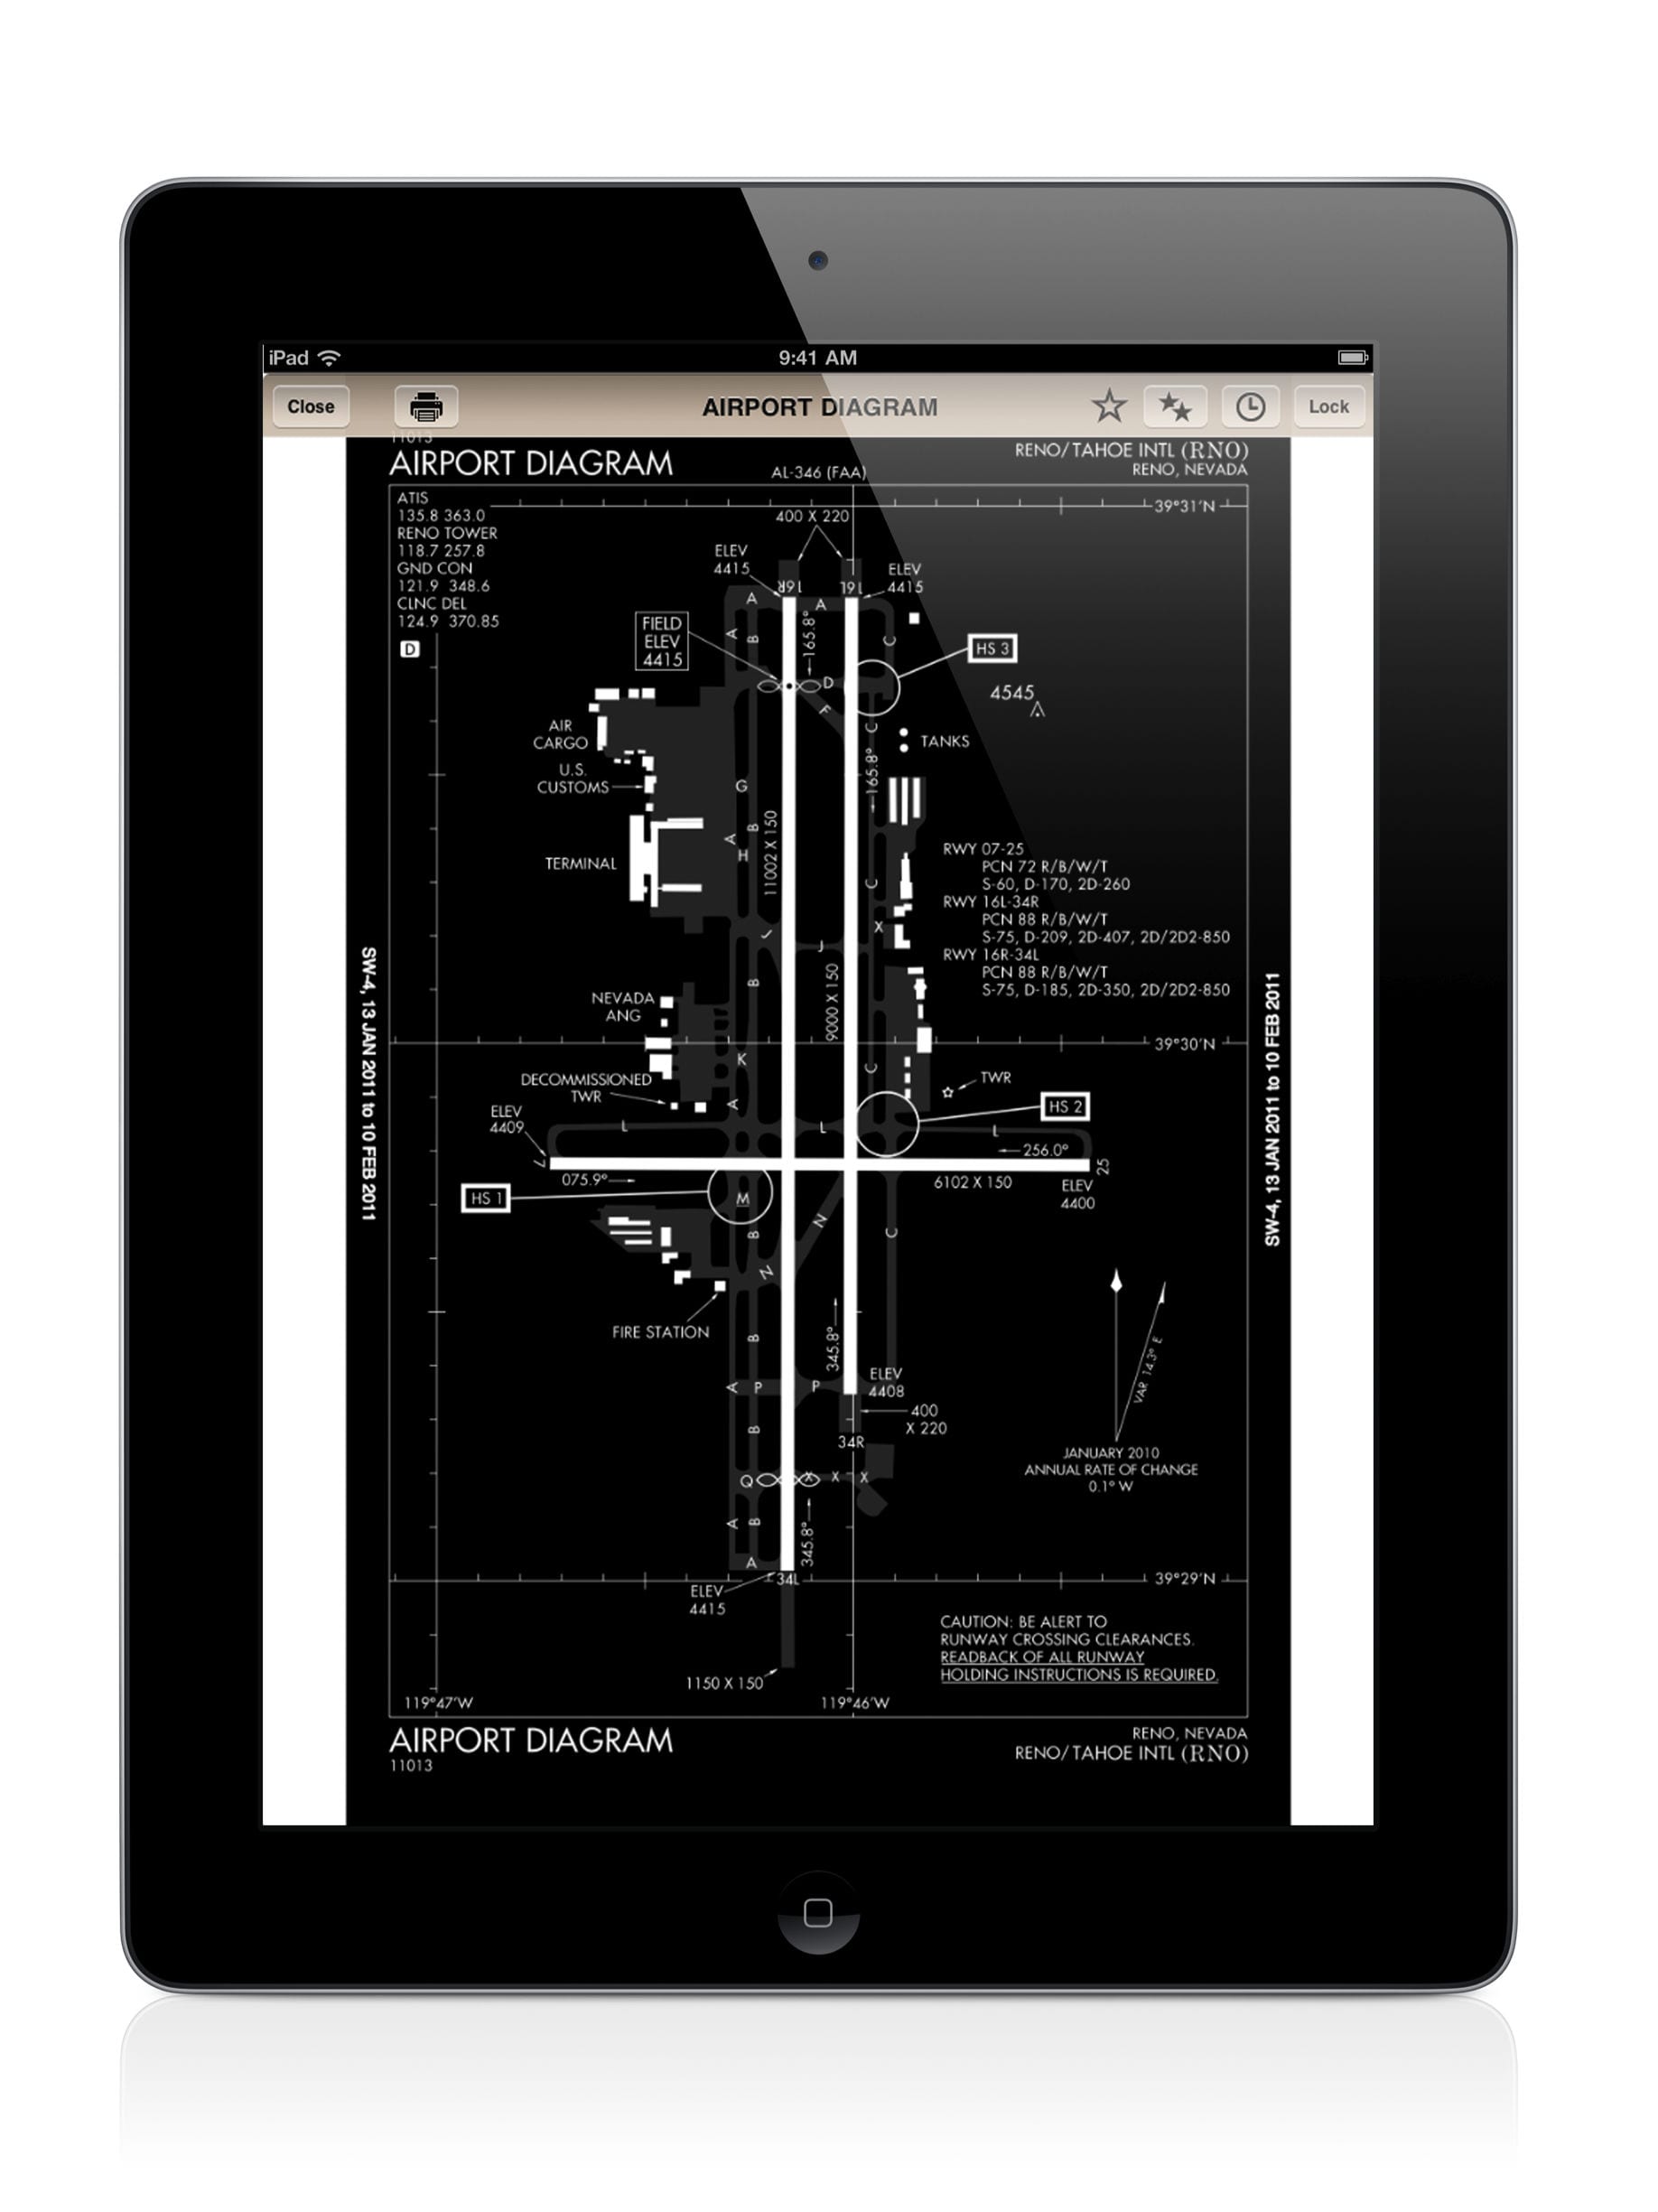
Night mode is a handy way to preserve your night vision.
4. Enable Night Mode for viewing approach charts at night
The iPad has a built-in feature that allows you to invert the colors on the screen — this is very useful when viewing approach charts at night by showing white text and graphics on a black background. Here’s how to enable it:
- Go to the Settings icon on the iPad.
- You’ll be at the “General” selection on the left by default; scroll down on the right side and select “Accessibility”.
- Select the “Triple-click Home” option now at the bottom of the list.
- Select “Toggle White on Black” from the list (you’ll see a check mark at the right when it’s selected).
Now, when viewing an approach chart and you click the home button three times quickly (circular button on the lower front of the iPad), you’ll invert the colors of the screen. This makes for a much better low-light viewing experience at night in the cockpit.
5. Use GoodReader for document management
Using an app called GoodReader ($4.99 from the App Store), you can store and organize a wealth of free PDFs and other aviation electronic documents. The options are almost endless, but here are a few recommendations:
- FAA Aviation Manuals
- Aircraft Flight Manuals
- Avionics Pilot’s Guides
- FAA Practical Test Standards
- Custom Aircraft Checklists and Limitations
6. Know that you are legal
For Part 91 VFR & IFR flying (the section of the regulations that most of us fly under in general aviation) you are completely legal to use the iPad for electronic charts, provided that the data is current and is a functional replacement of the paper version. Here’s a great article from the FAA’s Safety Briefing publication that covers the details: FAA Safety Briefing October 2011 (refer to page 21).
7. Bring a backup
When using the iPad loaded with current charts, you’re not legally required to have a backup source of data for Part 91 flying. However, I still think it’s smart to have a plan B. The type of backup depends on the type of flying you’re doing and the conditions of the day. VFR pilots might consider tossing a Sectional chart in their flight bag, while IFR pilots should consider having a few approach charts nearby. During IFR flights, I print out the following for the departure and destination airports: Airport Diagrams, appropriate ILS or RNAV approach chart based on the winds, and SIDs/STARs if going to a large terminal airport (I’ll point out here that I’ve never had the iPad fail on me once).
You might also consider carrying a second iPad, or use your smartphone loaded with current charts. Many of the aviation iPad charts are also compatible with the iPhone, so it can be helpful to download charts there as well in the unlikely event the iPad has a bad day.

An external GPS is cheap insurance.
8. Use an external GPS for reliable position data
Many pilots are confused by this. Having GPS on your iPad allows you to view a moving map display on popular apps like ForeFlight or WingX. But how do you get the GPS information?
The 3G model of the iPad includes an internal GPS. The GPS is completely separate from the 3G, so you don’t even have to have an active data plan for the GPS to work. And while the on-board GPS does work with all popular aviation apps, it was made for ground use and it’s not always reliable in the air. It has a tendency to drop offline, especially when switching between apps. It’s not necessarily a question of accuracy, but of reliability. For this reason, most iPad pilots–even those with a 3G iPad–opt for an external GPS. At only $99.95, it’s cheap insurance.
So which external iPad GPS to buy? There are two options: the Bad Elf and the Dual Electronics XGPS150 . They are the same price ($99.95) and they offer the same performance. The choice is really personal preference–do you want to plug in the GPS directly to your iPad (Bad Elf) or do you want to put the GPS on the glareshield and connect wirelessly (Dual)? The advantage to the Bad Elf is that you don’t have to charge its battery, as it runs off the iPad. The advantage to the Dual is that you can place it out of the way, but you do have to charge a battery.
9. Maximize iPad battery life
Apple states that the iPad battery should last a full 10 hours when fully charged. This is a pretty long time, considering the typical endurance of most airplanes is less than 5 hours. With that being said, there are some simple things you can do to maximize the charge:
- Turn off 3G cellular data (this is also the most likely source of interference with panel mount avionics)
- Turn off Wi-Fi and Bluetooth (provided a GPS or weather accessory doesn’t require one of these services)
- Set the screen brightness to the lowest viewable level
- Close unneeded apps that are running in the background: double-click the home button, press and hold the app icon until it wiggles, and then press the red circle to close it out.
- Let the iPad go into standby mode during the times when the iPad is not needed
As a side note, I’ve seen about a 30% decrease in iPad battery life when using the Dual Bluetooth GPS accessory.
10. Don’t leave the iPad on the glareshield during the day
After a flight and when organizing the cockpit, many find it convenient to temporarily store charts, kneeboards, etc. on the glareshield. Don’t accidentally do this with your iPad though – it will overheat in direct sunlight, and will be unusable until it cools down. It’s worth noting that, other than this scenario, I have not had any issues with the iPad overheating.

The reminder app is free, and useful for maintenance or currency tracking.
11. Use the iPad’s Reminders app for maintenance tracking
Being a pilot or aircraft owner often means keeping up with lots of currency issues, like flight reviews, annual inspections and medical expirations. Fortunately, the iPad has a built-in feature that makes it easy to stay current. If you are using iOS 5, you’ll see a Reminders app on your home screen. This very easy-to-use app allows you to make a to-do list, and specify dates and times to remind you. You’ll even get a pop-up alert at your pre-determined time, no matter what app you’re using.
12. Use Multi-Touch Gestures for easy multitasking
An overlooked feature that Apple included with iOS 5 is Multi-Touch Gestures. These allow you to quickly perform routine tasks without relying on the bottom Home button. To activate this functionality, go to Settings -> General, and towards the bottom you’ll see the Multitasking Gestures On/Off switch. Here’s a brief summary of each function:
- Pinch to the Home Screen – Use this instead of pressing the home button to access the home screen from within any app. Place 4 or 5 fingers spread out on the screen, and pinch together.
- Swipe Up to Reveal the Multitasking Bar –Use this instead of pressing the home button twice to access the multitasking bar. Place 4 or 5 fingers spread out on the screen, and move your hand upward.
- Swipe Left or Right Between Apps –This allows quick movement between applications that are currently running. With an app running, place 4 or 5 fingers spread out on the screen. Now, move your hand to the left to switch to the last opened app. With the same motion, move your hand back to the right to switch back to the previous app.
Let’s hear from you. Are you an iPad pilot? What tips do you have?
- Garmin introduces D2 Mach 2 Pro smartwatch with LTE, Iridium - April 24, 2026
- SkyDemon offers simple, VFR-only app experience—is it enough for US pilots? - March 24, 2026
- How to Improve Your iPad’s Battery Life - February 19, 2026

RECENT COMMENTS