5 ways to get more out of Garmin Pilot
The more often you use an app, the more you learn about it. And so it is with Garmin Pilot, a powerful electronic flight bag app that packs in a lot of features – but only for those who know where to look. If you’re already a pro at the basics like flight planning and chart downloads, check out these five tips to take your skills to the next level.
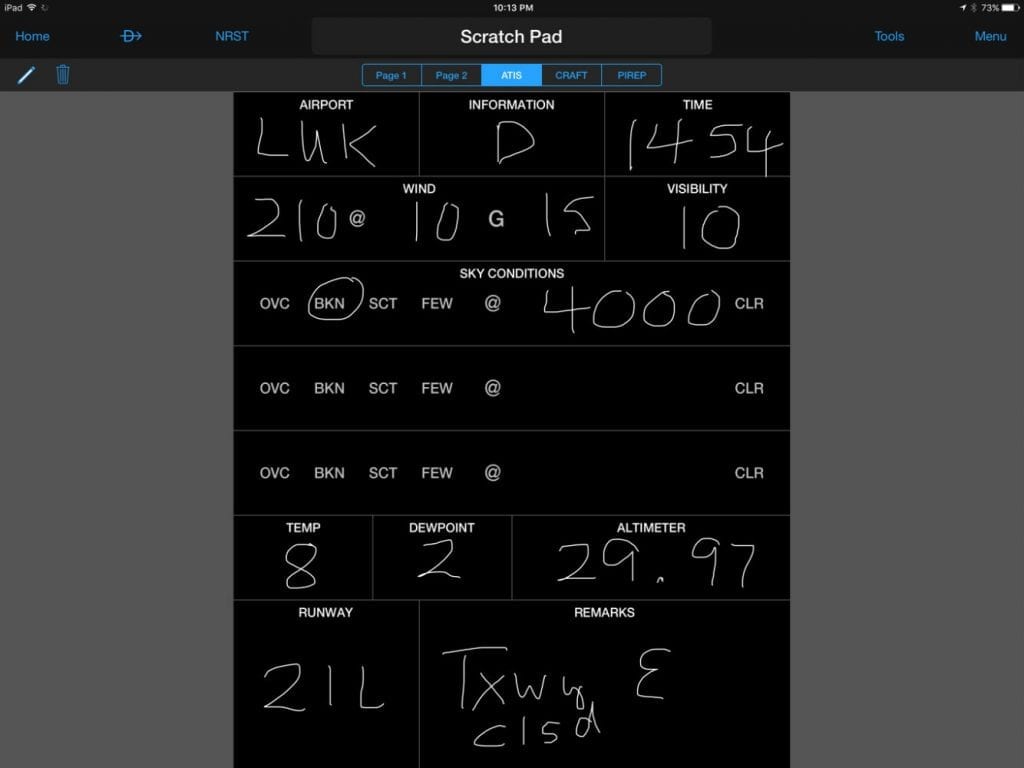
1. Use different scratch pad templates. The move to a totally paperless cockpit usually runs into trouble with scratch pads, since a lot of pilots still like to write down a clearance with a pen and paper. If you’re considering ditching the paper but having trouble, try Garmin’s newly-upgraded Scratch Pad feature. One way to make it easier to write on your iPad is to use the pre-populated templates for common tasks. Tap Home, then Scratch Pad. At the top, you’ll see five buttons. Page 1 and Page 2 are just blank screens where you can write anything, but the next three come with templates for ATIS, clearance (in the familiar CRAFT layout), and pilot report. Particularly for copying weather, we’ve found this to be a real time saver.
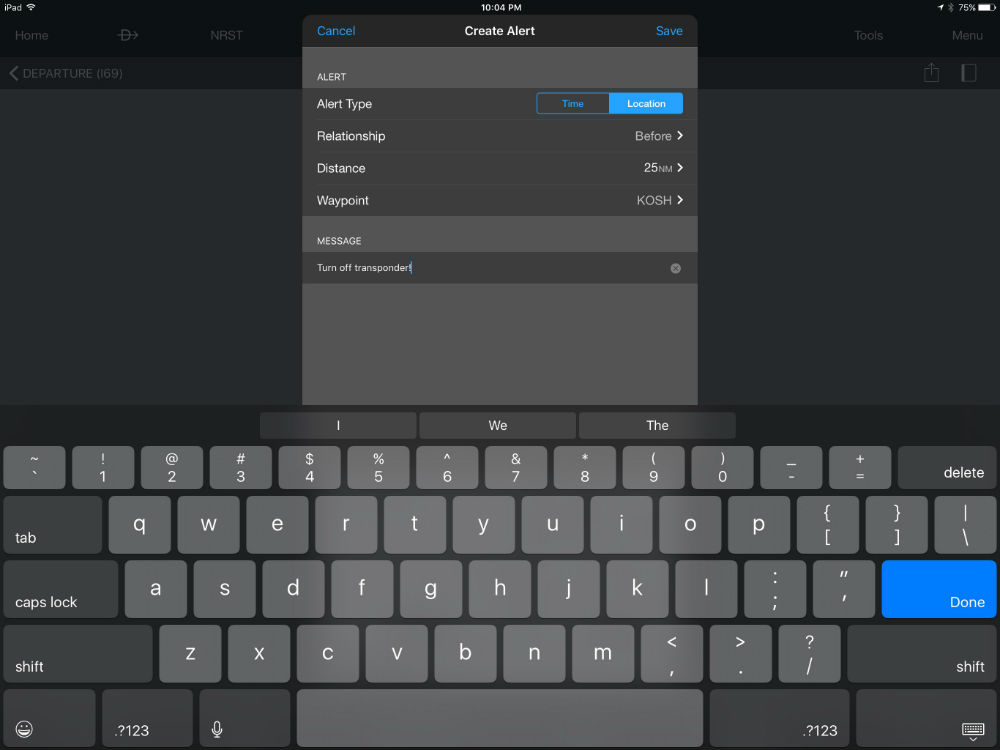
2. Create pop-up alerts. An underutilized feature in our opinion is Garmin Pilot’s Alerts feature. From the Map page, tap the Tools menu at the top right, then Alerts. From here, you can create an alert based on either time or location. There are all kinds of potential uses for this feature, like reminding yourself to switch fuel tanks, close a flight plan, call the FBO before landing, or turn off your transponder on the way to Oshkosh (as we’ve set up below). When your timer runs out or you reach your selected location, you’ll get a pop-up alert – no matter what screen you’re on.
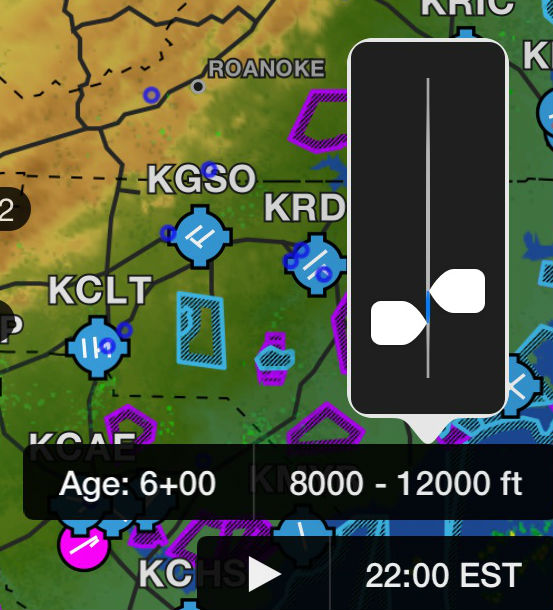
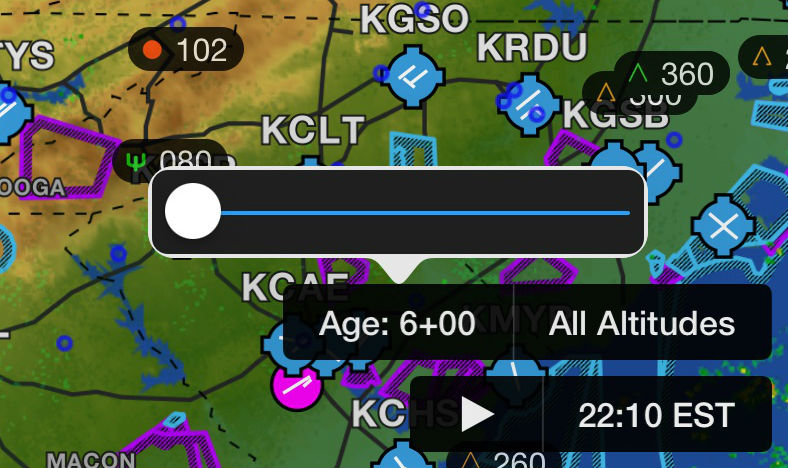
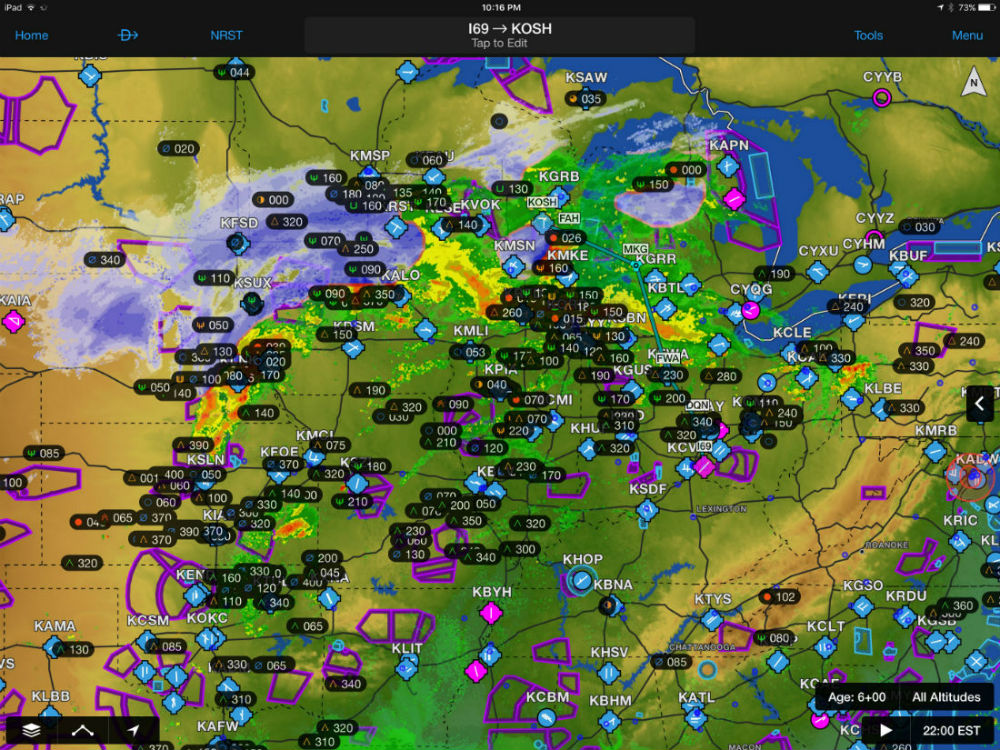
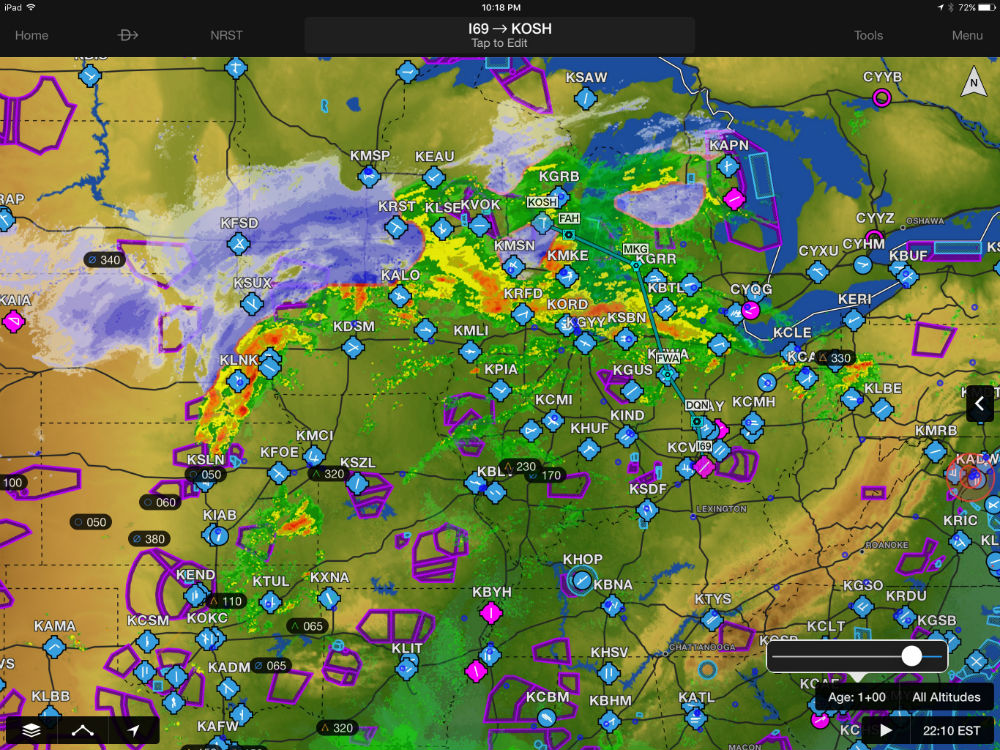
3. Declutter PIREPs by time and altitude. The Map page in Garmin Pilot can show a tremendous amount of information, which is both good and bad. PIREPs in particular can really clutter the screen if there’s a lot of weather around. Fortunately, the app offers two easy ways to declutter: by time and by altitude. By default, Garmin Pilot shows PIREPs at any point in the last six hours, and at all altitudes, but if you’re flying a 182, you probably don’t care about turbulence PIREPs at 38,000 feet. Tap on the “All Altitudes” button at the bottom right corner of the screen, then use the two sliders to select the altitude range you care about.
Next, tap the “Age: 6+00” button to the left of the altitude button and use the slider to determine how far back the app should look. In general, about two hours back is enough to get a representative view of things.
These two pictures show how effective this can be. First, the “before” screenshot, with all six hours of PIREPs showing:
And now the “after” screenshot, with PIREPs limited to one hour:
4. Visualize weather ceilings with profile tool. Split screen is another area where Garmin offers a lot of customization options. One that’s particularly powerful is the Flight Profile view. On the Map page, tap Menu, then Split Screen, then Flight Profile. This gives you a 3D view of your route, from terrain and obstacles to weather and airspace. Once you know what you’re looking at, there’s a lot of information available at a glance. For VFR pilots planning a cross-country flight, it’s easy to get a big picture view of ceiling and winds. This helps answer questions like, “where do the ceilings drop down?” or “where does it go from scattered to broken?” You can pinch to zoom, then tap on a weather symbol for complete details.
5. Find the highest obstacle along your route. This feature is most useful for helicopter pilots – in fact, it’s required by FAR 135.615 – but it’s a valuable exercise for any pilot flying at low levels. Again from the Map page, select Split Screen and Flight Profile. From here, tap the button at the bottom of the screen that says “Highest.” This will show a pop-up window with the location of the highest obstacle along your entire flight plan, its elevation and whether it’s lighted or not. You can also use the slider bar to adjust your route width from 0.3 miles to 20 miles.
- Do I really need to use Airplane Mode on my iPad or iPhone Pilot? - December 31, 2025
- Flying with the Garmin D2 Mach 2 and D2 Air X15 - October 28, 2025
- Weather planning with Garmin Pilot: widgets and flight profile - October 22, 2025




Trackbacks & Pingbacks
[…] are continuing our regular series on the finer points of popular aviation apps, to help you get the most out of your Electronic […]
Comments are closed.