
Weather planning with Garmin Pilot: widgets and flight profile
|
Getting your Trinity Audio player ready...
|
One of Garmin Pilot’s standout features is its split-screen mode. Accessed from the Map page, this offers numerous options for displaying important flight information while keeping the main moving map page in view. While many pilots know how to use split-screen for viewing approach charts or traffic, there are also some valuable tools for weather planning, both before takeoff and during cruise. Here’s how to use the Widgets and Flight Profile features.
Widgets
Widgets have been part of the Garmin Pilot app since the earliest days of the app, and is a feature not found on any other aviation app. Widgets are essentially data blocks that can be configured to show airport information, including METARs, TAFs, winds aloft, and NOTAMs. To display them, first tap on the arrow on the right side of the screen to open up split-screen mode, then tap the icon above the arrow to choose Widgets.
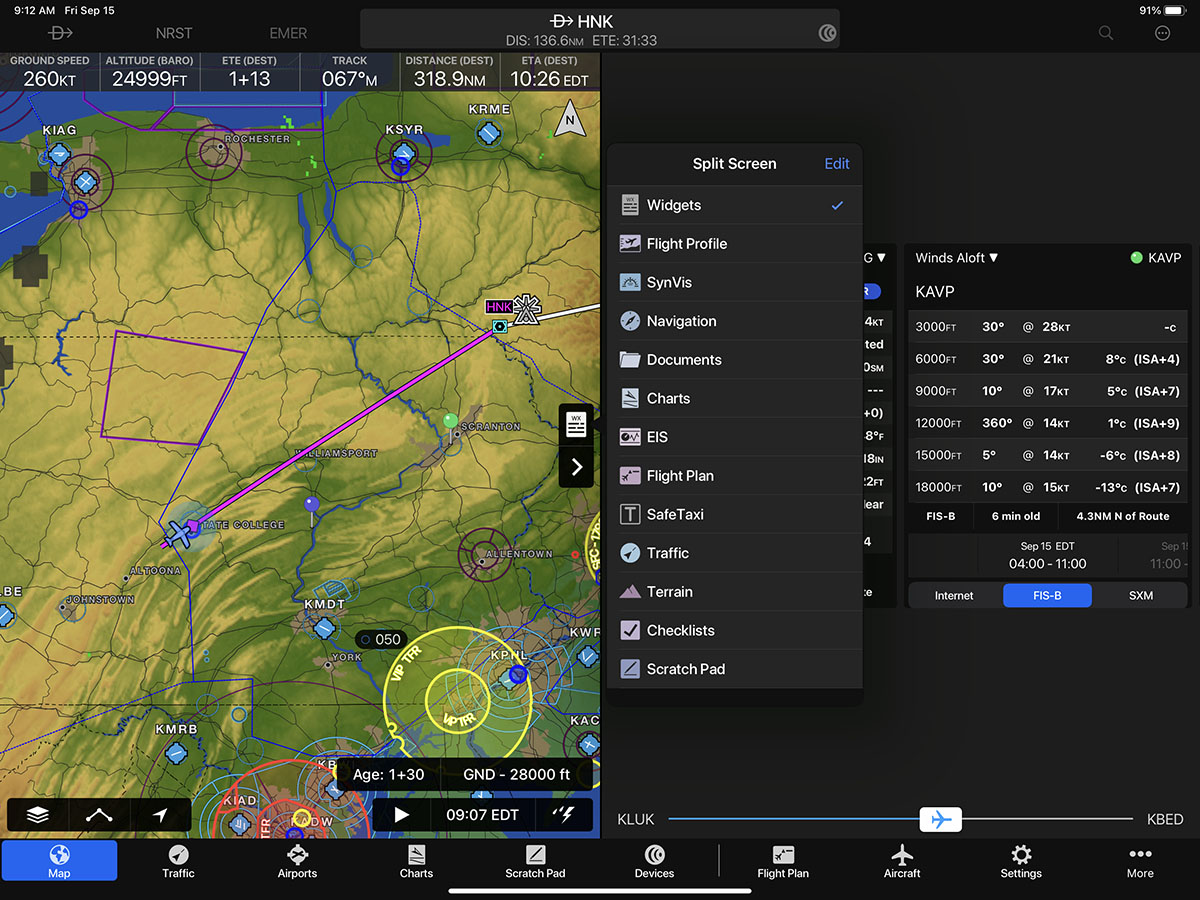
Two widgets are shown by default (on most iPad screens) when in landscape mode; in portrait mode you’ll usually see three. To change what the widgets show, tap on the arrow next to METAR or TAF to open the menu of widget types. This allows you to display whatever information is most valuable for you.

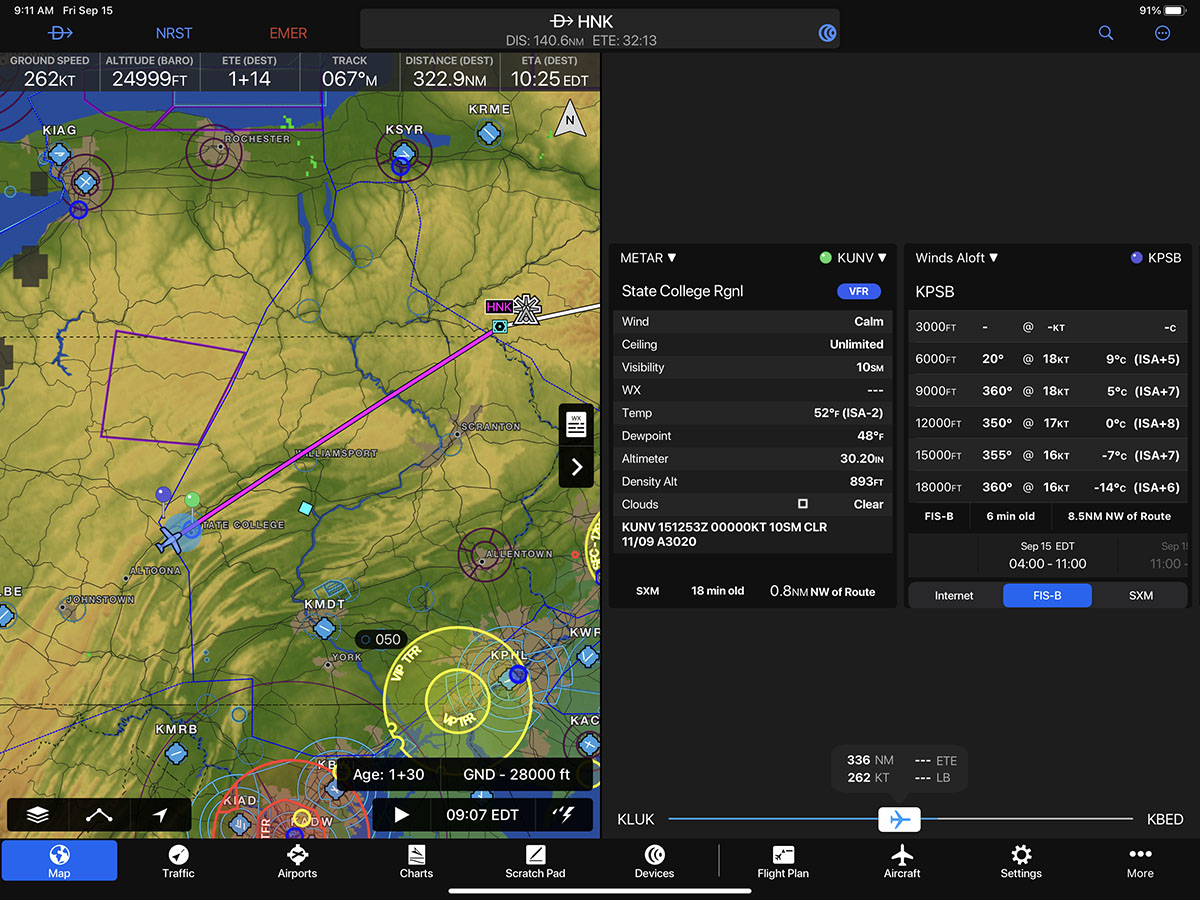
The powerful part is that the app allows you to quickly scroll through numerous widgets with a slider bar at the bottom of the screen. So if you want to see how visibility is dropping along your route, slowly drag the slider to the right and watch the METAR move along your route. You’ll see a pin on the map at left showing where the widget is located, and it will move as you continue to slide along your route. Also note the bottom of the widget shows the source (in this case SiriusXM), the timestamp (18 minutes ago), and how far off course the report is (0.8 miles northwest of your route).
Widgets make it easy to review a lot of information in a short amount of time, and are just as valuable in-flight as they are when planning. For example, if you’re considering changing altitude due to winds aloft, you can scroll through a number of winds aloft forecasts to see how your new plan might work further along your route.
Flight Profile
Another valuable tool that’s exclusive to Garmin Pilot is the Profile view, also accessible from the split-screen menu. This brings up a side view of your flight, complete with terrain and weather. You can choose which overlays you prefer by tapping the stacked layers button in the bottom left corner of the Flight Profile screen. In our experience, it’s particularly good for wind and icing.
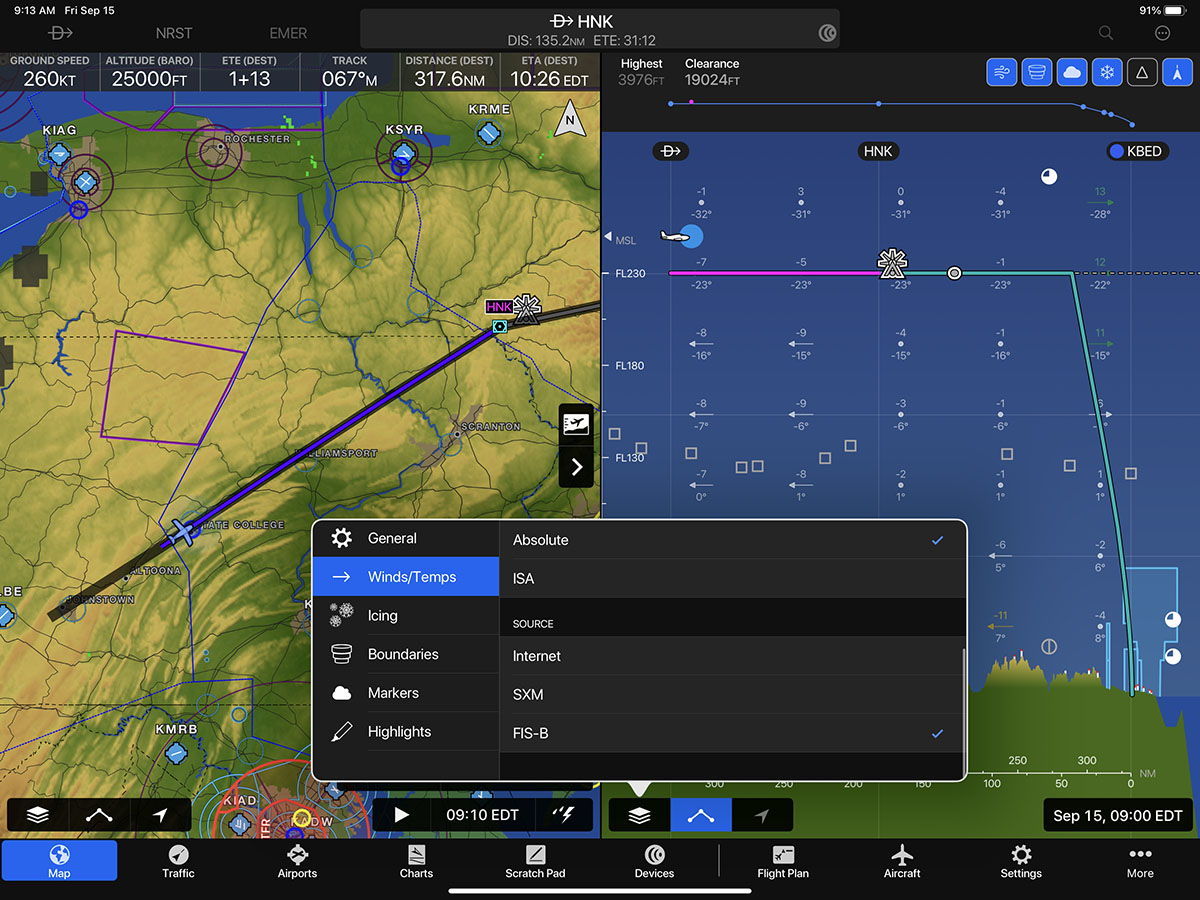
You can also tap on a METAR to see the full report, which is great for putting weather information in context. If there’s a forecast icing layer, you can quickly find out if the airport underneath is above freezing or not.

PIREPs are another helpful layer in the Flight Profile view. The 3D nature of the tool is helpful for deciding what might impact your flight and what can be ignored, since PIREPs are shown at their altitude and it’s easy to see how close it is to your current cruising altitude.

Bonus features
It’s worth mentioning that widgets aren’t just for airport data. You can also set them to show navigation data like groundspeed, ETA, and distance to destination.

You can even set a widget to display logbook entries and then view the track on the left side of the screen; simply tap on a track to see the green flight path on the map. This is a great way to quickly review recent flights.

- Garmin introduces D2 Mach 2 Pro smartwatch with LTE, Iridium - April 24, 2026
- SkyDemon offers simple, VFR-only app experience—is it enough for US pilots? - March 24, 2026
- How to Improve Your iPad’s Battery Life - February 19, 2026


Your value to the flying community is invaluable. I learn so much in such a short period of time. Thank you!