Eight iOS settings all iPad pilots should know
|
Getting your Trinity Audio player ready...
|
The Settings app was fairly basic when the iPad was first released in 2010, providing control of the Bluetooth and Wi-Fi wireless radios, screen brightness and email account settings. Ten years later it has evolved into a collection of hundreds of settings, with multi-tier menus that can make it difficult to find what you’re looking for.
It’s so complex that Apple includes a search function within the Settings app to locate buried preferences. There’s also the control panel, which is accessed by sliding your finger down from the top right corner of screen to quickly change frequently used settings.
All these settings and configuration options are great for customizing everything to your liking, but at the end of the day there are really only a few settings you need to be concerned about when using the iPad as an EFB in the cockpit. Here’s a quick rundown.
1. Disable Auto-Brightness
Accessibility > Display & Text Size > Auto-Brightness
Apple moved this important setting from the main Display & Brightness screen and buried it deep in the Accessibility settings, making it a bit of a challenge to find. During testing, we’ve found that lowering screen brightness by about 20 – 30% will give an extra hour of battery life in the air.
By leaving auto-brightness enabled, the iPad will automatically reset the brightness to full bright when you get into the cockpit and shorten the useful battery life. And at night you’ll probably find the need to lower the brightness of the screen below the minimum value, using the in-app brightness dimming feature found in most apps.
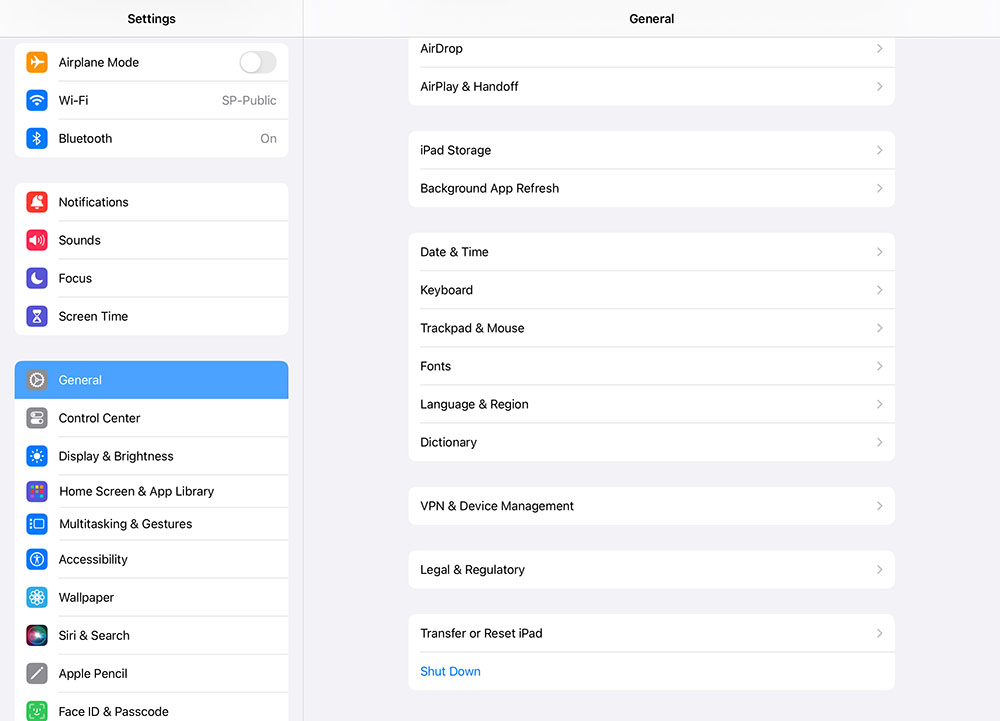
2. Power off without the power button
General > Shut Down
Pilots have found great value in mounting their iPad right in the panel, but this can restrict access to the buttons on the side of the iPad, including the main power button. Fortunately, you can also power down the iPad right from the Settings screen.
3. Configure location services
Privacy & Security > Location Services > Custom app settings
This is the spot to specify a preference for each app on whether or not it can access your location. Some may disable a particular app’s use of location for privacy issues, but more importantly from the pilot’s perspective we’ve found that using location services in the background decreases battery life.
Allowing ForeFlight to show your position on the chart or record your tracklog is great during flight, but you probably don’t need the Weather Channel tracking your location as you routinely drive around your hometown. Consider setting this option to “While Using” for certain apps, to allow it to use your location when the app is open, but prevent unnecessary battery use when running in the background. Read more about iPad Location Services here.

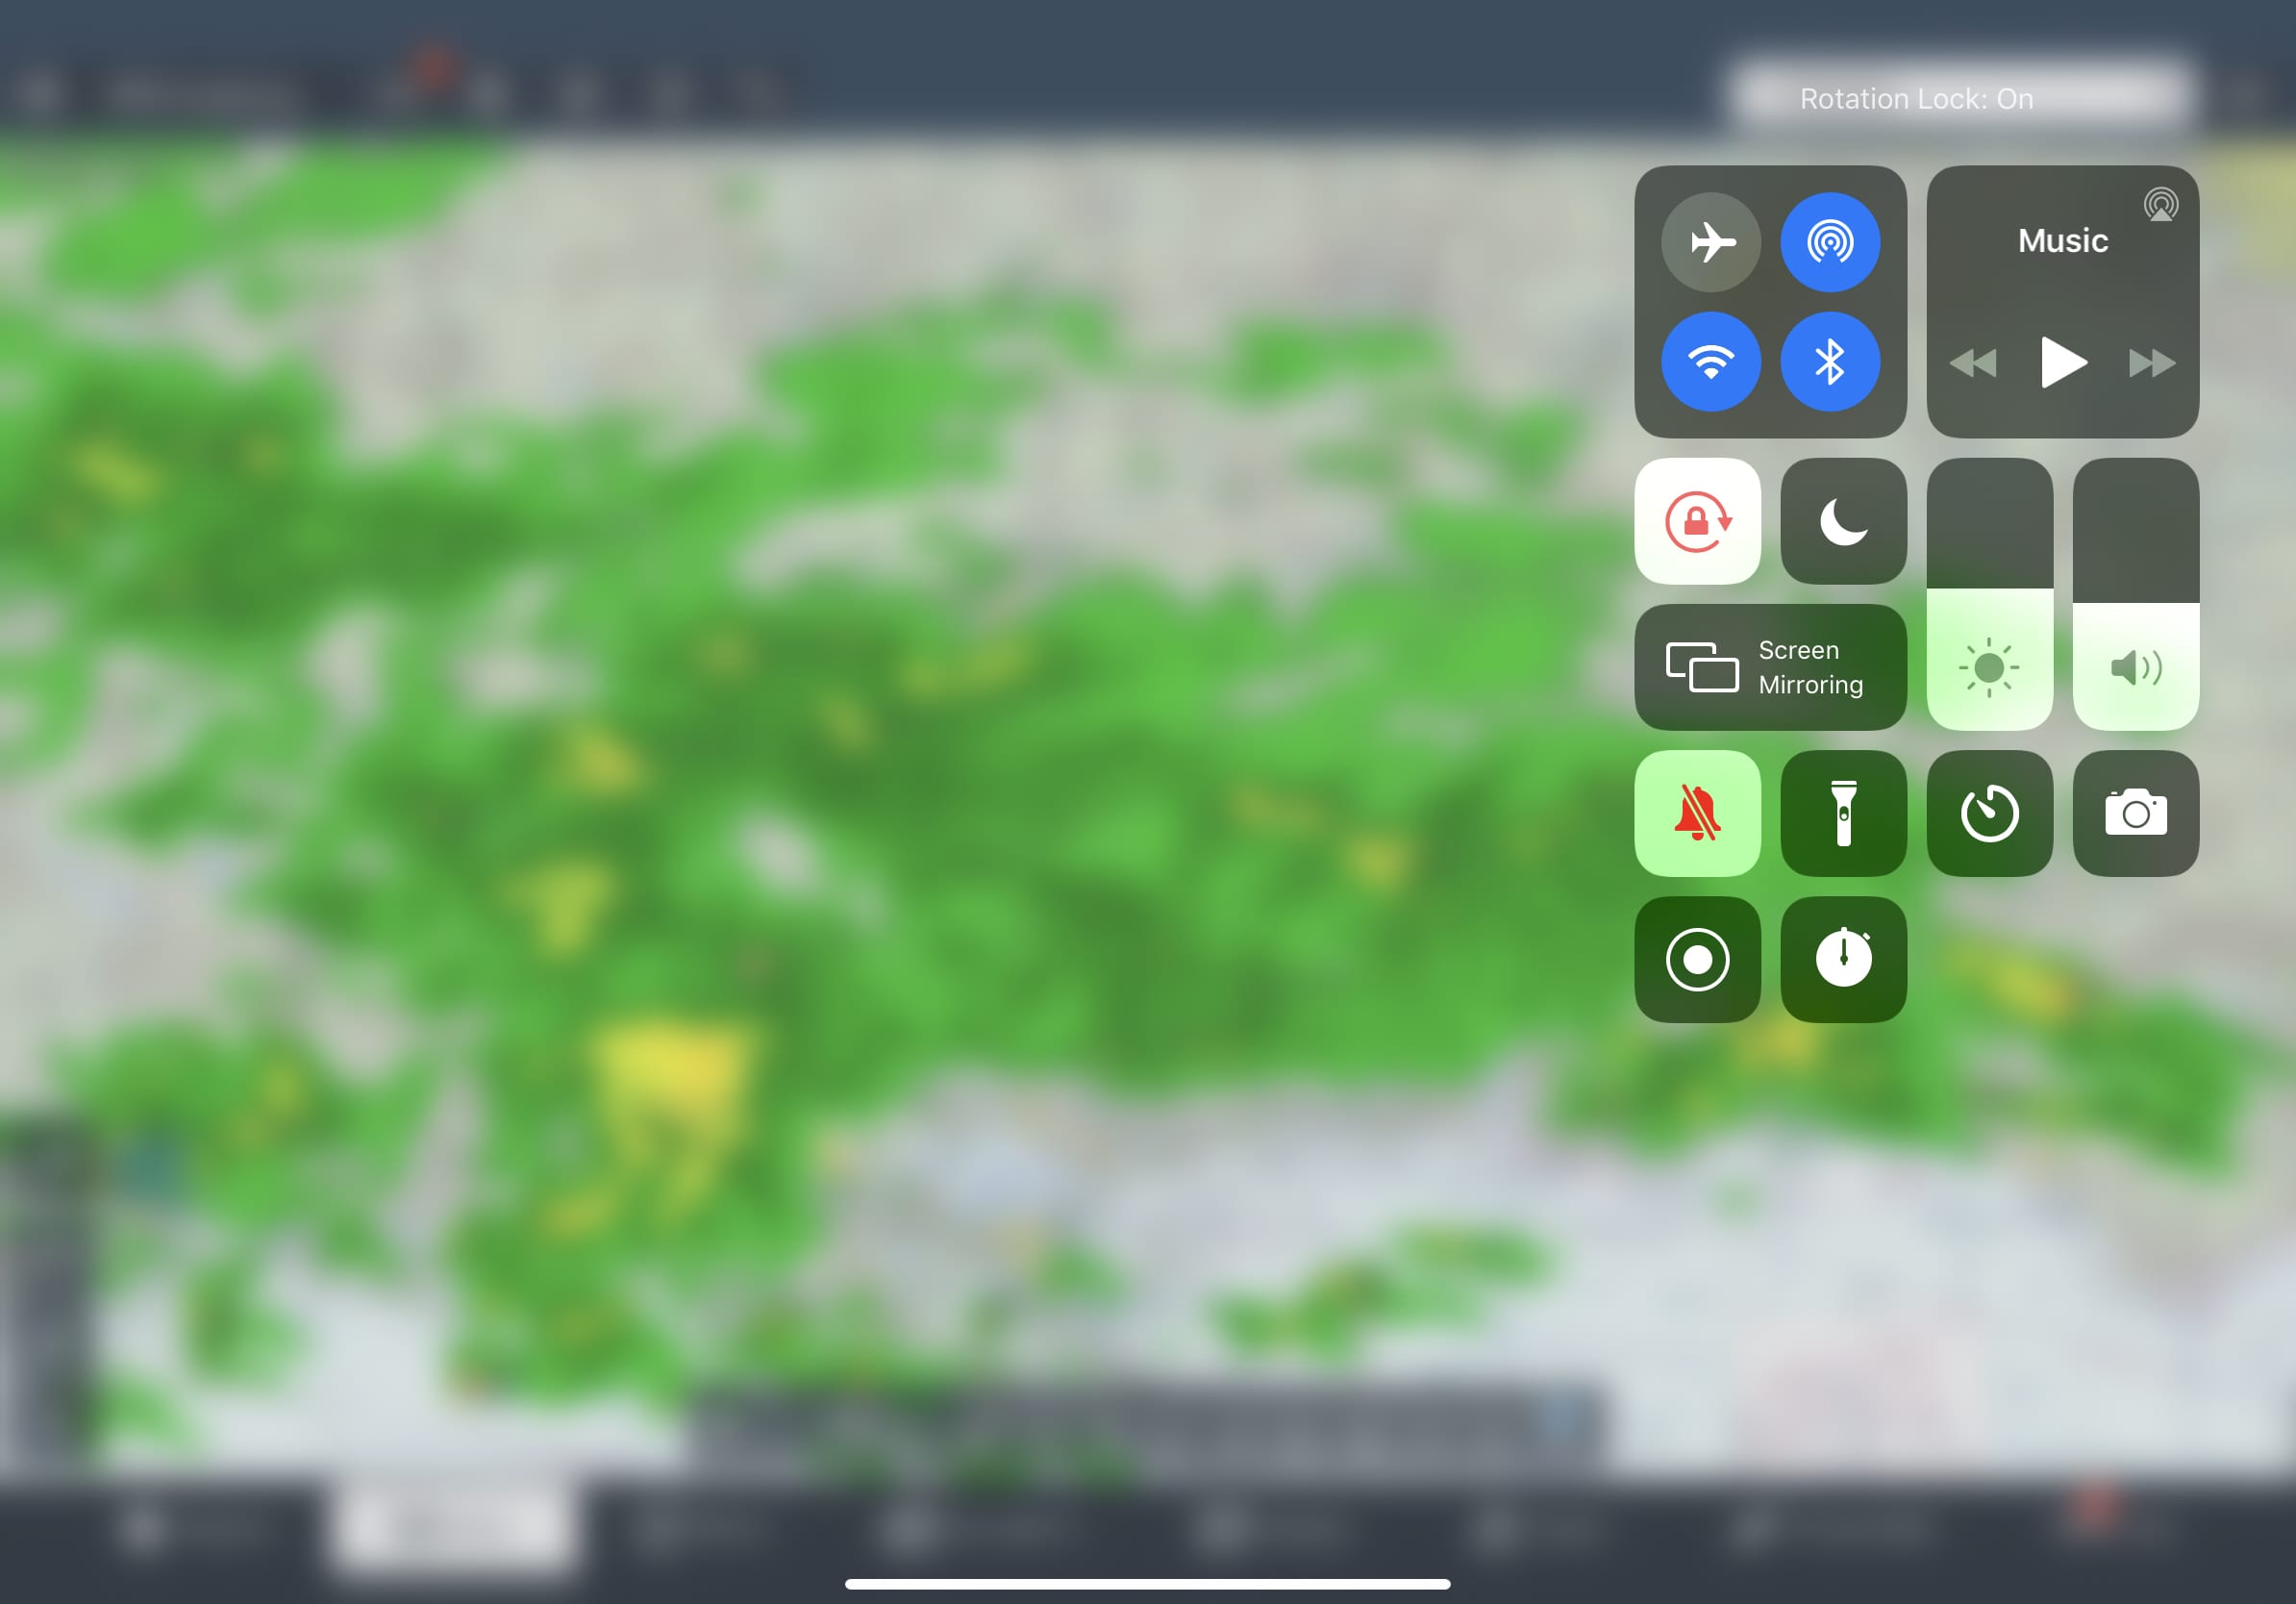
4. Lock rotation
Control Center (swipe down from the top right of the screen)
This setting is located in the control center, allowing you to access it anytime without having to leave your active app. It allows you to lock the orientation of the screen, which is useful when flying in turbulence and you don’t want the screen to inadvertently change the layout when viewing a particular chart.
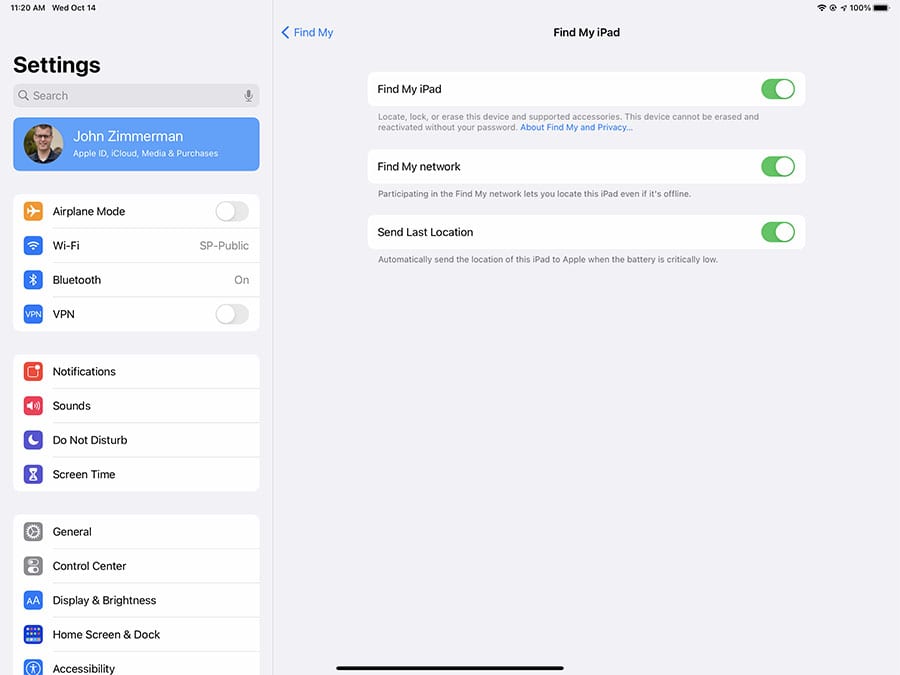
5. iCloud Find My iPad
Apple ID > Find My > Find My iPad (and Send Last Location)
This setting should be on by default, but it’s a good time to verify while you have the iPad in your possession. You’ll find this extremely helpful (we know by experience) when you misplace your iPad or leave it in the airplane. Enabling this option allows you to locate your device using a computer, iPhone (with the “Find My” app on your iPhone) or another iPad. Make sure to also enable the setting here called “Send Last Location”, which will automatically send the location of the iPad to Apple when the battery is critically low, in case it takes a few days for you to track it down and the battery runs out of juice. There’s also a new option called “Find My network,” which offers another way to find a lost device. As Apple says, “The Find My network is a crowdsourced network of hundreds of millions of Apple devices that can help users locate a missing iPhone, iPad, Mac, Apple Watch and soon, third-party Find My network-enabled accessories, using the Find My app. Devices in the Find My network use Bluetooth wireless technology to detect missing devices or items nearby and report their approximate location back to the owner.”
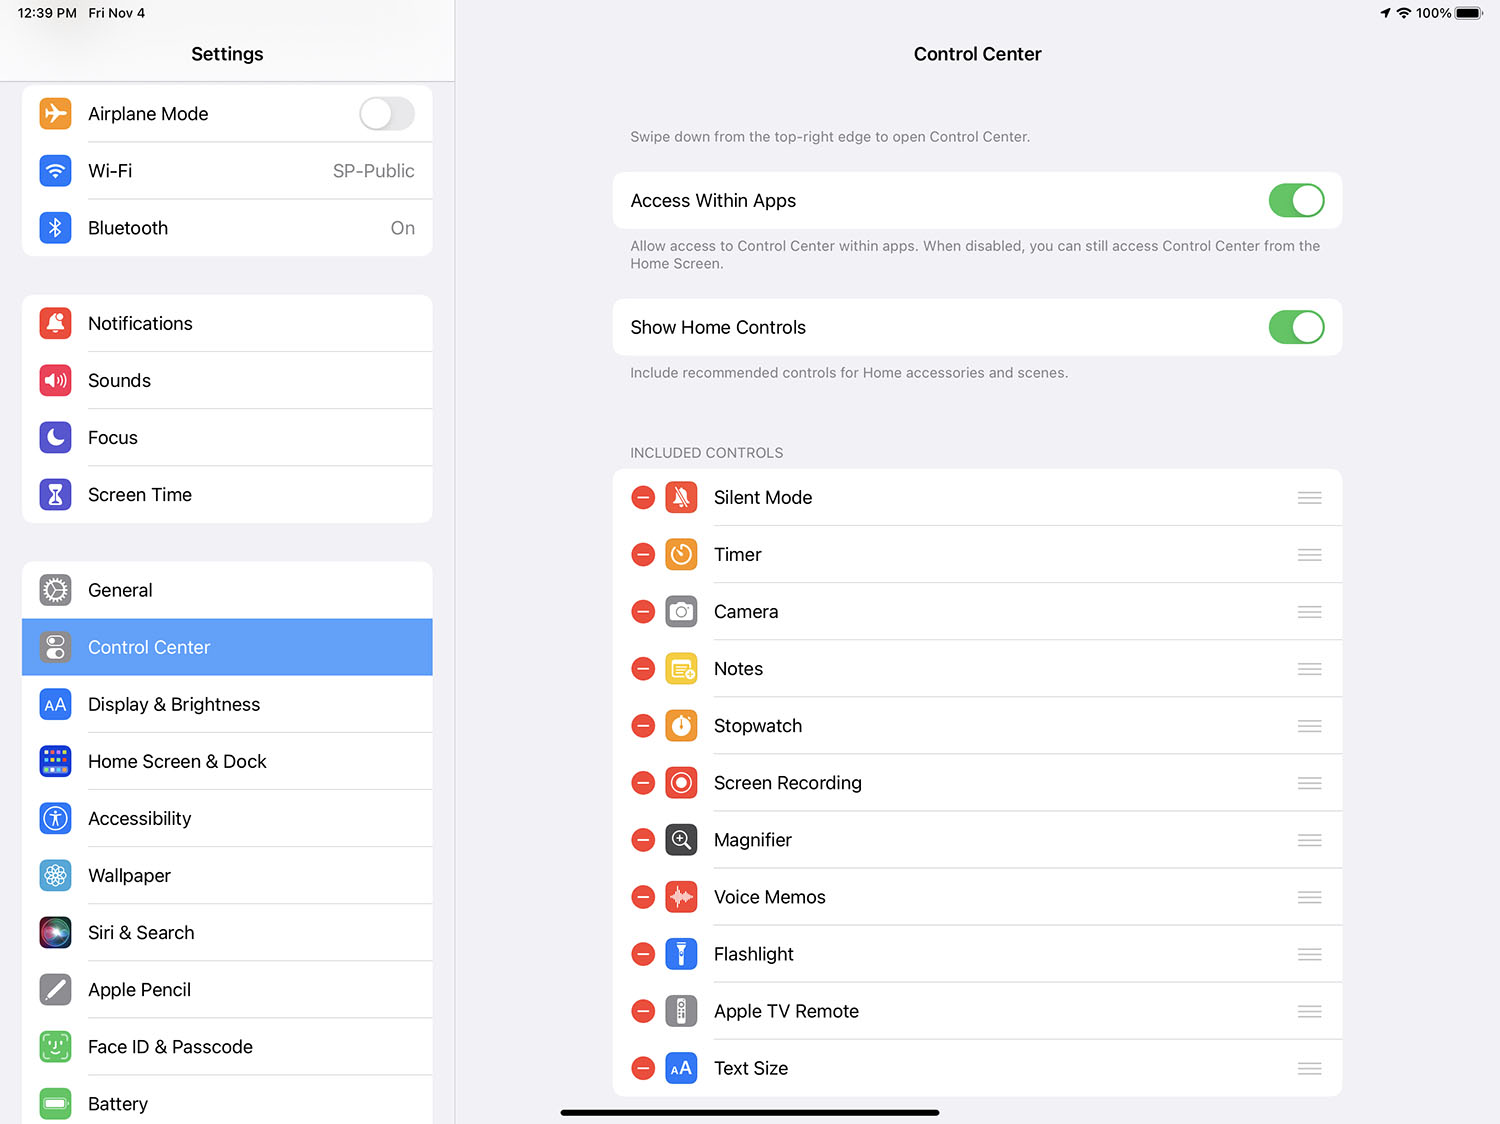
6. Customize the Control Center
Control Center > Included Controls
The iPad Control Center can be accessed at any time by swiping down from the top right of the screen. This provides quick access to frequently used controls, like screen brightness, volume, wireless settings and more. What you may not have realized is that you can customize this layout from the main settings app and add (or remove) additional buttons for even more shortcuts. We like to add flashlight and timer features for quick access in flight.
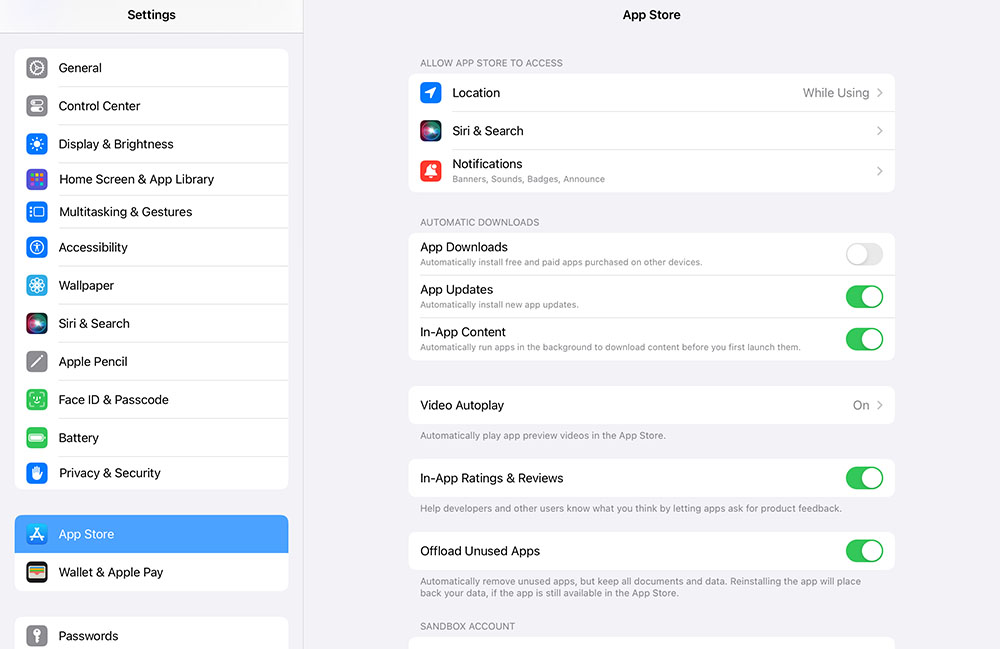
7. Disable app auto-updates
App Store > App Updates
While having your iPad automatically download and install new app updates may at first seem like a helpful feature, leaving this feature enabled can leave you high and dry at the worst possible time. Many of the popular aviation apps need to connect to the internet the first time they launch after an update, which will render them useless at 8,000 feet if you don’t take care of this task on the ground first. For this reason, we recommend updating your apps manually and launching them right after the update to make sure they’re functioning as expected and have the necessary data installed.
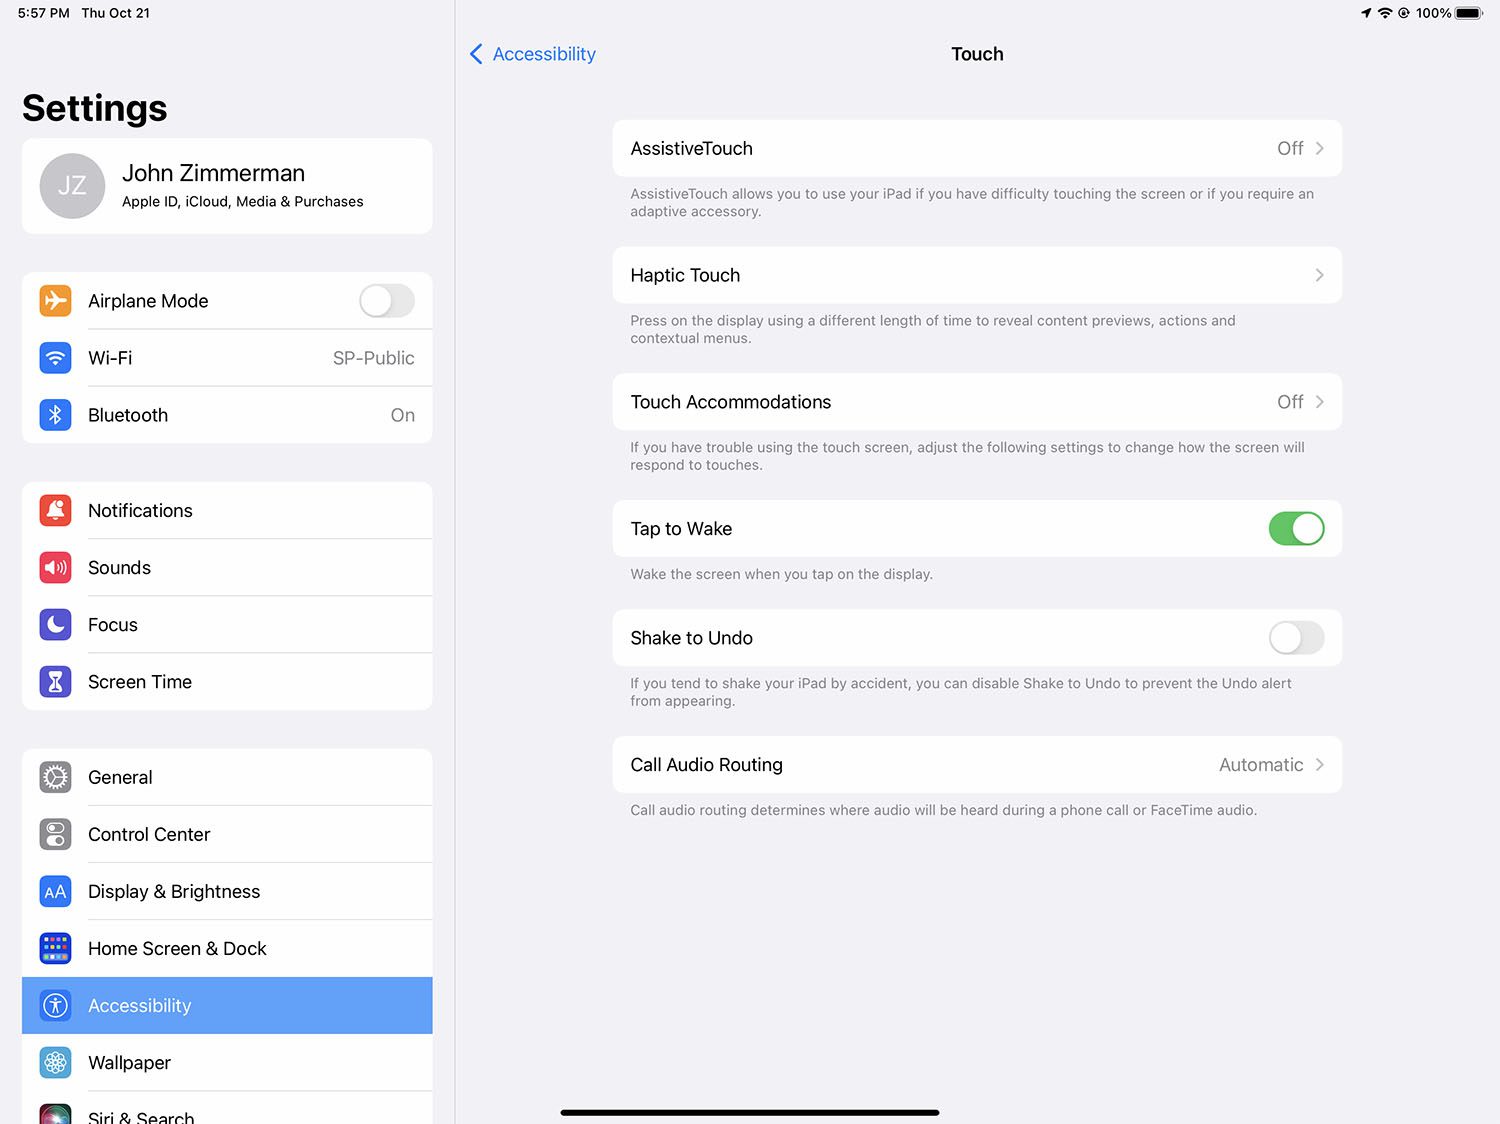
8. Disable shake to undo
Settings > Accessibility > Touch > Shake to Undo
This feature has been causing frustration and confusion almost since it was introduced. If you’ve ever dropped your iPad or hit some moderate turbulence, you may notice a pop-up alert about “shake to undo.” This is a quick way to undo any typing you just entered, but for pilots it’s almost always a bad idea. To turn this feature off, you’ll have to dig around a bit: Settings, then Accessibility, then Touch. Turn off the Shake to Undo option.